Importing Data
The data import feature allows you to create multiple entries simultaneously, saving you significant time. You can prepare this CSV file manually using Excel or another spreadsheet tool, or export it from your previous accounting software.
Requirements
Before you begin, ensure your file meets the following criteria:
- You are importing either clients or expenses.
- The first row of the file must contain column headers.
- The total number of rows per import is limited to 100.
CSV File Templates
Use these sample files to ensure your data is formatted correctly before uploading.
Specifics for Expenses
If you want to link imported expenses directly to existing clients, make sure the clients are already created or imported into Factura. You can then match them by including their email address in the "Client" column of your CSV.
For expense categories and suppliers, Factura will automatically create them if they don't already exist. Ensure names in your CSV match exactly with existing ones in Factura if you want to avoid duplicates.
Step-by-Step Guide
Uploading the CSV File
- Navigate to the "Import Data" section within the "Settings" menu.
- Drag and drop your CSV file into the upload zone or click to browse your files.
- Click "Continue."
Mapping Your Data
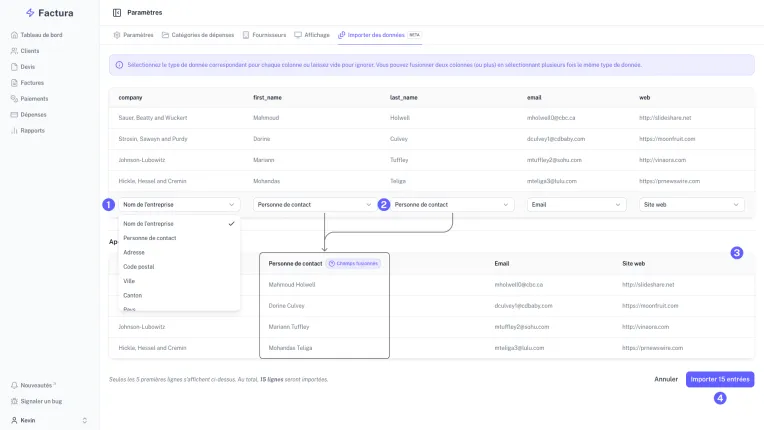
- For each column you wish to import, select the corresponding data type from the dropdown list.
- You can merge multiple columns by choosing the same data type for them.
- A preview of the mapped data will appear at the bottom of the page.
- Once you are satisfied with the mapping, click "Import Entries."
The import process takes just a few seconds. Once finished, your new data will be available in its respective section.